Building Blender/Mac
Building Blender for macOS
Building Blender for macOS needs a bit of preparation. However the steps are not very complicated and if you follow the instructions carefully you should be able to build Blender.
macOS 10.13 High Sierra and newer is supported for Intel processors. macOS 11.0 Big Sur and newer is supported for ARM processors.
Quick Setup
Install Development Tools
Install either:
- Xcode from the App Store, to get a full development environment.
- Xcode command line tools by running this in the terminal. This takes up less disk space.
xcode-select --install
Install CMake and Subversion
CMake and Subversion must be installed and available to be used by Blender.
There are multiples ways to install them. We recommend using Homebrew. Follow the install instructions on the Homebrew website, then run in the terminal:
brew install cmake svn
Other package managers like MacPorts and Fink work as well. You may also install CMake and Subversion manually. This is more advanced and requires ensuring cmake and svn commands are in the PATH.
Download Sources and Libraries
Now you are ready to get the latest Blender source code from Blender.org's Git repository. Copy and paste the following instructions into a terminal window. These will create a blender-git folder off your home directory and download the latest source code, as well as addons and external libraries.
mkdir ~/blender-git
cd ~/blender-git
git clone https://projects.blender.org/blender/blender.git
cd blender
make update
For additional information on using Git with Blender's sources, see: Tools/Git
Building
The easiest and fastest solution is to build Blender with the default settings, and simply run this in the Terminal:
cd ~/blender-git/blender
make
After the build finished, you will find Blender.app ready to run in ~/blender-git/build_darwin/bin.
Updating
If you later want to update to and build the latest version, run:
cd ~/blender-git/blender
make update
make
If building fails, it sometimes helps to remove the ~/blender-git/build_darwin folder to get a completely clean build.
Branches
With the quick setup instructions the main branch will be built by default, which contains the latest Blender version under development.
To build another branch or a pull request, first checkout the branch and then run make update to update the add-ons, libraries and tests to match.
cd ~/blender-git/blender
git checkout <branch-name>
make update
make
Depending on how big the changes are compared to the main branch, it may be necessary to remove the build folder ~/blender-git/build_linux. Otherwise the build folder may still refer to libraries from another branch.
Advanced Setup
Build as an Xcode project
Before starting with this section ensure you have completed the first three steps from the Quick Setup section: installing XCode, installing CMake, and downloading the external libraries.
If you like to work with the Xcode IDE and build Blender from within it, you need to generate an Xcode project.
Generating the Project
This assumes that you have added CMake to your path as described in the Quick Setup. Then execute the following instructions in a terminal:
cd ~/blender-git/blender
cmake . -B ../build_xcode/ -G "Xcode"
This will generate the CMake cache files and an Xcode project file in ~/blender-git/build_xcode.
Building Blender in Xcode
Go to the folder with the generated the project file, and double click Blender.xcodeproj to open it in Xcode.
Then follow these steps to setup your project:
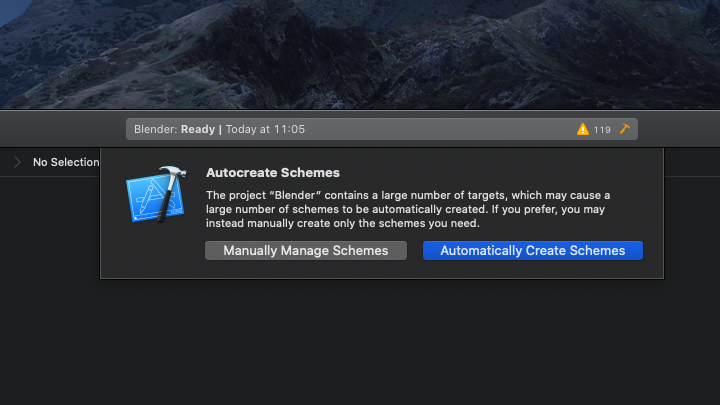
1. Choose Automatically Create Schemes if you are being asked after opening the project file.
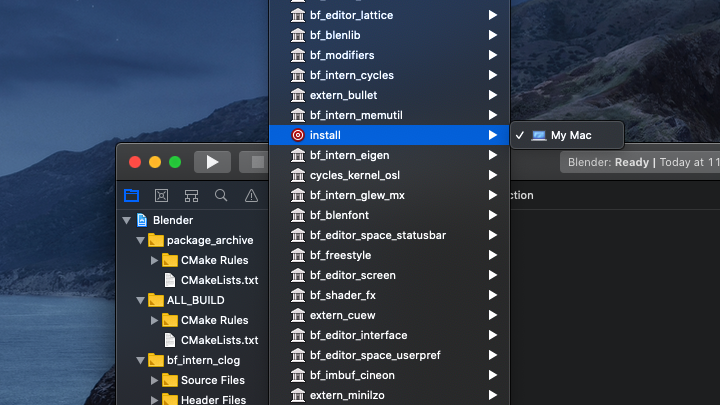
2. Change the Active Scheme popup in the upper left corner of the XCode project window to install.
3. Select menu Product->Scheme->Edit Scheme
- Edit Scheme is located all the way at the bottom of the list of targets. Or just Press Command-<.
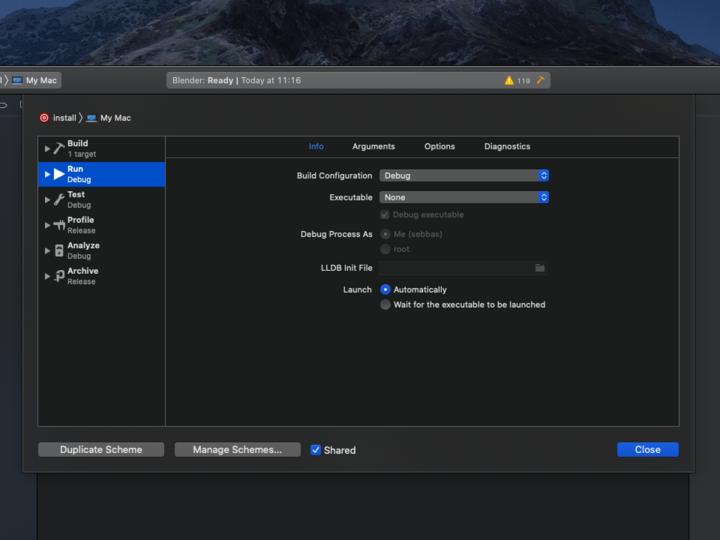
4. Select the Run item from the left view and you will see something like this:
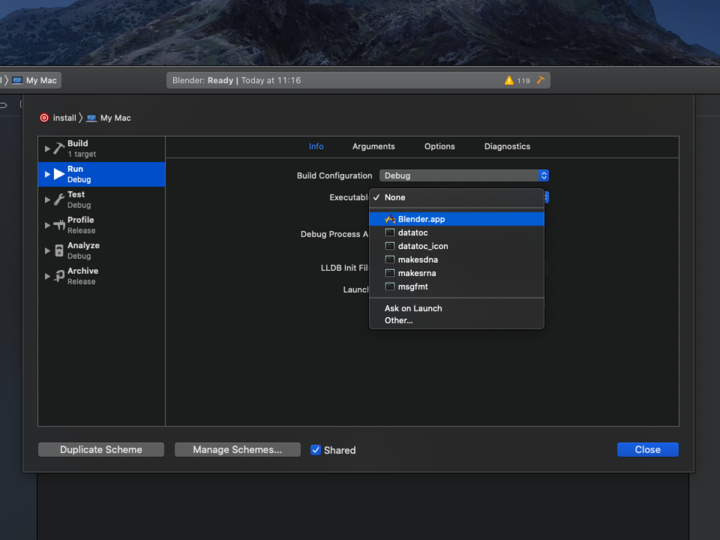
5. Select the Blender App from the Executable popup menu.
6. Click Close to save changes.
Now clicking the Run triangle next to the Active Scheme popup should build the application and launch Blender in the debugger.
Troubleshooting
If you have both the minimal command line tools (in /Library/Developer/CommandLineTools/) and Xcode (usually in /Applications) installed, xcode-select --print-path shows the path to the C/C++ compiler toolchain which will be used by CMake. It can be reset to a good default by running sudo xcode-select -r.


